This is part 2 in a series about using VR to create holographic experiences today.
Part 1: Where are all the holograms?
Part 2: 3D depth and immersive holograms in VR
Part 3: Best VR apps for reliving your memories as 3D holograms
Part 4: Volumetric holograms you can experience today
Table of contents:
Your own personal holograms
Have you ever wanted to step into your old photos or videos? You imagine these remembered moments vividly, but what if you could sit next to your young child again, years after they’ve grown up? Though the 2002 movie “Minority Report” had a fairly unbelievable basic premise, elements of it were amazingly prescient in predicting where technology would actually lead. Many people remember the large glass touch screens that Tom Cruise’s character used to interact with his computer, but the moment that always stood out to me was the scene where he watched old home movies at life-size, playing out within his living room. He did this with a holographic projector of some sort, but we can do something very similar with a VR headset.
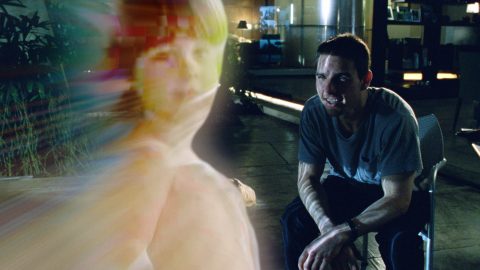
If you have reams of photos and videos that you’d like to experience this way, it’s easier than it’s ever been, although it still has room to improve. There are some nice options for adding 3d depth and immersion to your existing flat images and videos, but the technology can be glitchy, hard to use, and not always cheap. The process relies on using artificial intelligence to guess/predict the depth of the scene from having analyzed thousands of examples. It gets it right pretty often, but other times it leads to some bad artifacts. If all you have is a collection of flat media, then you’ll take what you can get, but it won’t feel particularly real. On the other hand, bringing any depth at all to old memories can be quite powerful.
History of 3D photos
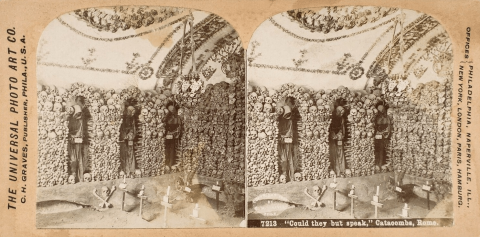
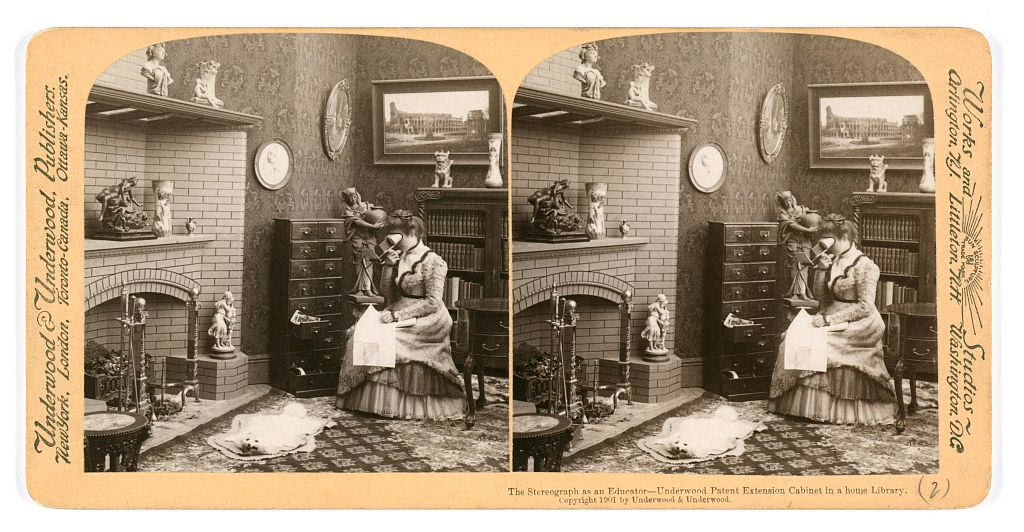
Despite how modern we feel, 3D imagery isn’t a new field. As far back as the mid-1800’s, we’ve had 3D (stereo) photography. The principal is simple. Take a picture, then move the camera a few inches to the left or right and take another. Alternatively, you can synchronize two cameras to capture two images at the same time. Either way, you have a left and a right image. The only trick is to be able to look at them such that each eye only sees the correct image.
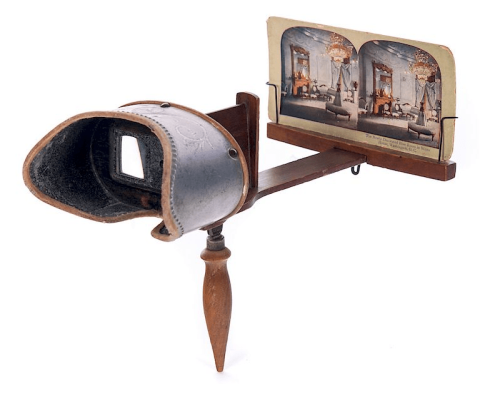
This was accomplished with stereoscope viewers and other handheld devices that simply provided a mount for the image, and a fixed distance to place your eyes, along with a separator to direct your eyes to the right image. Many people, the author included, can simply cross their eyes the right amount to view the 3D effect – no device needed. The View-Master device is a more modern example most people are familiar with that operates on a similar principle.
All the dimensions
Stereo photography waned for many decades, but never really went away. In the 1950’s, there was a brief resurgence with the advent of anaglyph 3D movies, the ones with the red and blue glasses. Today, it’s still a niche, but with VR headsets, we have a way to view these images in a way that can start to feel realistic. You can even capture your own flat (traditional), dome (180°) or spherical (360°) 3D photos with a number of cameras at a range of prices. While flat 3D (such as the vintage stereogram card above) can look great in VR, they are still more like sitting in front of a 3D movie screen. Some things come toward or away from you, but it’s not immersive. The best results for VR come from dome stereo videos and pictures (called VR180 format), and then they need to be processed with powerful algorithms to go from a smooth dome to natural depth around you.
Common types of 3D content include:
- Flat 3D
It seems ironic to use the word “flat” with “3D”, but it refers to the shape of the lens. This is simply taking two normal photos with the lens separated by some amount. Some cameras have two lenses, but you can also manually take two photos a few inches apart then use software to align them. - 180°
This implies a convex/fisheye lens that captures the entire dome around the camera. As with any lens type, one image would be 2D, two would be 3D. - VR180
This is a specific format for two 180° photos taken side-by-side. Just like JPEG or MP3 files are universal, using VR180 ensures that any compatible software knows how to view it. A fun fact about two 180° lenses is that it’s common to be able to see the edge of the other camera in each image, although it’s often cropped out. - 360°
This is a photo taken using two 180° cameras back-to-back, or some other arrangement of cameras pointing in every direction. To do this in 3D, it requires flatter lenses (that don’t see each other) with two cameras pointing in each direction. Many videos labeled as “VR” on YouTube are actually 360° videos. They’re fine when watching on a desktop, but not good enough with a headset. - Fully volumetric
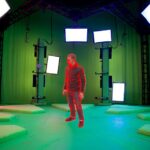
Unlike the fixed viewpoint of the above types, this is the result of multiple cameras capturing the entire volume of a subject. Typically, used for characters or things rather than entire scenes. By processing images from every angle (like in photogrammetry), you have an entire 3D model, more like an action figure than a photograph.
Distortion and Projection
If you take a 180°/360° image or video and view it outside of VR, some video players will let you click and drag to look in different directions (YouTube does this), but if you open it in the wrong viewer, it will look stretched and very strange. This distortion is due to “projection”, or the process of taking a curved surface and mapping it to a flat surface – just like the difference between a map of the earth and a globe. The edges in the image have the most distortion, which is why looking straight up and down can look messed up. Even flat lenses have some distortion to them, due both to the curved surface and the round shape projected onto the flat sensor.
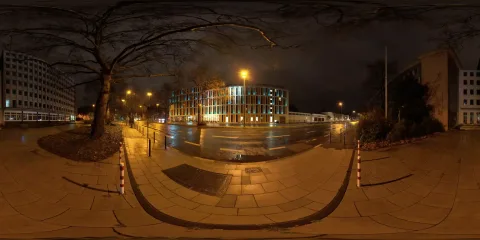
(source: hdri-hub, CC BY SA 3.0)
Capturing depth
All of the different formats above can provide a 3D experience, but in VR we expect more depth. A stereo image will make the subject appear in front of the background, but if you move your head, the effect goes away quickly since it’s just the single viewpoint – there’s no side view. A solution to this is to augment the photograph(s) with additional information to use when reconstructing the image turning it into more of an embossment, or cameo. It doesn’t add any new details, but it has a much more natural look.
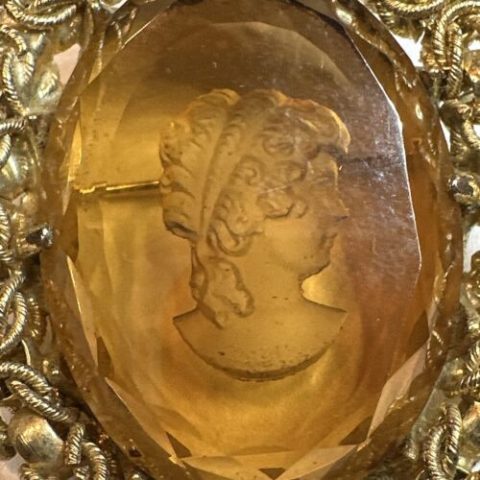
In order to record this additional information, data called a depth map is recorded or constructed. If you’re familiar with topographical maps, you may be aware of how the concentric geographic shapes depict elevation changes by how close they are together.
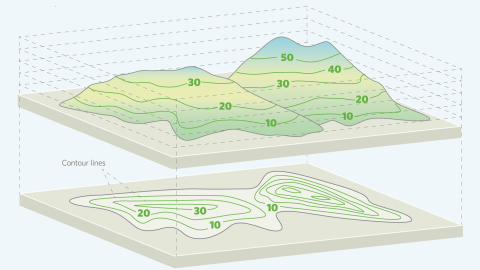
You can imagine that if you had a satellite image (that is, a flat top-down view) of a landscape, plus the terrain map, you could reconstruct a decent 3D image. This is how Google Maps/Earth does it.
In a similar vein, a depth map can be added to any flat photo of a person or scene to indicate the distance from the camera to each pixel of the photo. Typically, depth maps use shading from white to black, with the brightness corresponding to the depth. Putting it together in a 3D viewer, like a VR headset, you can create the illusion of reality.
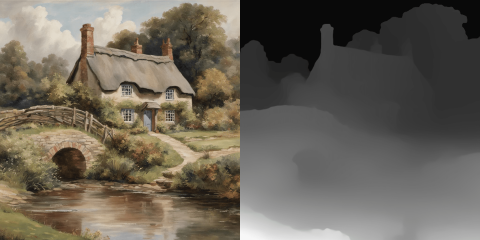
Depth maps are automatically created by modern Android and iOS phones when used in Portrait mode. In the case of iPhones, a special sensor actually captures the real depth using technologies such as LiDAR. For devices without this additional sensor, the depth may be calculated using AI algorithms that look at clues like shading and color based on training on large numbers of photos with actual depth data.
Any 3D content can provide some depth to work with, but it can’t see behind things. With or without a stereo camera, it’s possible to use AI to predict depth from the source imagery (like a phone’s Portrait mode). That same AI can also fill in small regions so you can move your head to the side a bit and “see” the edges. The Looking Glass Blocks service can perform these calculations and make it easy to share your creations (as seen with the apples above). It will never be a perfect view, but it still adds a deeper dimension to your memories. With the depth applied, it’s possible to extract the subject from the background so your living room can become the background with the foreground at full-size, as in the Minority Report example from earlier.
Summary
Though the quality will definitely vary, it’s possible to take your existing photos and videos and add semi-realistic depth to them for immersive VR viewing. For those interested in taking things further, you can buy specialized cameras that will capture a fuller image from the start.
It’s exciting to see memories brought back to life, and definitely a great reason to get into VR! In case you’re ready to get started, Since this article went so long, I decided to publish a list of recommendations of specific web sites, apps, and services as part 3 of this series. If you liked this article, please repost and share. Happy hologramming!


Leave a Reply